
Learn
BEFORE USING THE NUMBEE, DOWNLOAD DETAILED INSTRUCTIONS
FOR USE BY CLICKING HERE
PLEASE BE SURE TO VISIT OUR VIDEOS PAGE WHERE WE HAVE COMPILED A NUMBER OF HELPFUL VIDEOS
Intraligamental Syringe
We are often asked, “Does the NumBee work on xxxx Device?” The answer is, if you can screw a standard dental needle on the device in question, then you can use the NumBee with that device. If you purchased an intraligamental syringe from us, here are instructions for use. Start by clicking the picture below for an expanded view of the syringe:
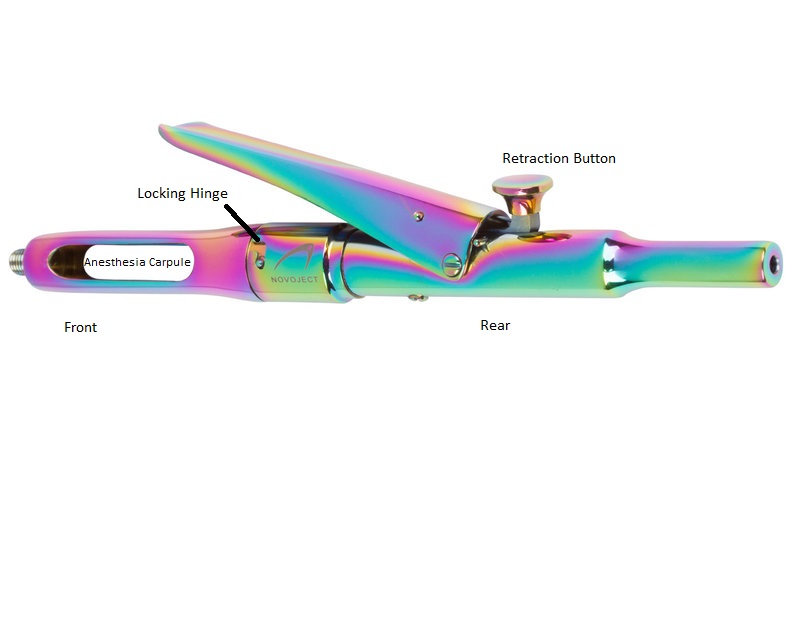
First, unscrew the front from the rear at the locking hinge or, if you have a more recent model with threaded ends, unscrew at the joint. There is a plastic tube inside the syringe. This tube is to protect you and your patient in the event the glass anesthetic carpule were to break during use.
Insert the plastic tube into the front, then insert your carpule and attach the NumBee. If you prefer to attach the NumBee first, you can do that too. However, it is important to take care not to bend the canula when inserting it into the carpule. When attaching the NumBee, it is important that you do not over tighten or force the NumBee onto the screw tip. If you encounter resistance while you are attaching the NumBee, unscrew and begin again. Forcing the NumBee onto the screw tip can cause breakage. If this occurs, do not use; unscrew the NumBee and use a new one.
Once you have loaded your syringe and attached the NumBee, re-attach the rear to the front and twist to lock the locking joint. Click the lever a few times until fluid begins expressing from the tip of the NumBee. Then use as appropriate. Each click of the syringe will express approximately .06 ml of anesthesia.
When finished, remove the NumBee from your device by unscrewing it from the device and disposing of it with your sharps. DO NOT PULL THE NUMBEE OFF YOUR SYRINGE. DOING SO MAY EXPOSE THE CANNULA AND MAY RESULT IN A STICK INJURY. Firmly press the retraction button until the internal piston retracts. Then unscrew the front from the rear at the locking hinge, remove and dispose of the anesthesia carpule. REMOVE THE PLASTIC TUBE BEFORE AUTOCLAVING THE SYRINGE.